Setting up Wireguard with Pi-hole
Linux|August 26, 2026

This guide will go through the process of how to set up a Wireguard server on Debian, and how to integrate it with Pi-hole for ad blocking capabilities. I'll be setting this up on a very low spec VPS
Before starting, let's make sure everything is up to date on the system:
sudo apt update
sudo apt upgrade
Once that's completed, let's install wireguard:
sudo apt install wireguard
The next step is to create the Wireguard network interface, but before we do that, we'll need to generate some key pairs.
Firstly, we'll create a new wg directory in the home directory to store the keys:
mkdir ~/wg
cd ~/wg
Next we'll generate a key pair for the wireguard server:
wg genkey | tee private.key | wg pubkey > public.key
And we'll also create another key pair for our example client:
wg genkey | tee client_private.key | wg pubkey > client_public.key
We'll now have the following files in the ~/wg directory:
client1_private.key
client1_public.key
private.key
public.key
We'll need the contents of the private.key file, and the client_public.key file when creating the wireguard interface in the next step. The get the contents of these files we can use this:
cat private.key
cat client_public.key
This will display the key values which will be look similar to this:
kHb4CWEsdt6kt+bq944QPnp1AzpO9M1DXZ7n67CFkGQ=
Now to set up the wireguard interface, we'll need to create a new file at /etc/wireguard/wg0.conf:
[Interface]
Address = 10.0.0.1/24
ListenPort = 51820
PrivateKey = <paste contents of private.key here>

# Optional: DNS settings for clients
#DNS = 10.0.0.1

# Optional: Post-up commands to enable NAT
PostUp = iptables -A FORWARD -i %i -j ACCEPT; iptables -t nat -A POSTROUTING -o eth0 -j MASQUERADE
PostDown = iptables -D FORWARD -i %i -j ACCEPT; iptables -t nat -D POSTROUTING -o eth0 -j MASQUERADE

# Peer configurations (add one block per client)
[Peer]
# Client 1 - Public key and allowed IPs
PublicKey = <client_public_key_here>
AllowedIPs = 10.0.0.2/32
Now the interface has been created, we need to start it up:
sudo systemctl start wg-quick@wg0
sudo systemctl enable wg-quick@wg0
And we can verify if the interface has come up successfully:
sudo wg show wg0
The final piece is to create a client config file. For this we'll need the client private key and the server public key values:
cat ~/wg/public.key
cat ~/wg/client_private.key
The client config looks like this:
[Interface]
Address = 10.0.0.2/24
PrivateKey = <client_private_key>
DNS = 10.0.0.1

[Peer]
# Server details
PublicKey = <server_public_key>
Endpoint = <your_server_ip>:51820
AllowedIPs = 0.0.0.0/0
PersistentKeepalive = 25
Troubleshooting
IP Forwarding
On the server, we need to make sure that IP Forwarding is enabled. We can check this by doing:
cat /proc/sys/net/ipv4/ip_forward
If it returns 0, then it's disabled and we can enable it by doing:
sudo sysctl -w net.ipv4.ip_forward=1
We can also make it persistent by adding to /etc/sysctl.conf:
net.ipv4.ip_forward = 1
Check NAT / Masquerading
Even with forwarding enabled, the server needs to NAT traffic so responses find their way back.
Let's first check if POSTROUTING is already enabled:
sudo iptables -t nat -L POSTROUTING -n -v
If it's not showing, then let's add it. Before adding the rule, it's good to double check the network interface. Usually it's eth0, but sometimes it's different:
sudo ip route show default
The response will be similar to this:
default via 10.14.178.1 dev ens3 proto static
In the above example, instead of the usual eth0, the device is ens3.
Your iptables/nftables rules should include something like the below, just remember to change the interface if needed:
sudo iptables -t nat -A POSTROUTING -s 10.0.0.0/24 -o eth0 -j MASQUERADE
Pi-hole
To install Pi-hole, we can use their automated script:
curl -sSL https://install.pi-hole.net | bash
There are a few settings screens but they're all self explanitory.
Once the Pi Hole installer has finished, you'll get a similar message
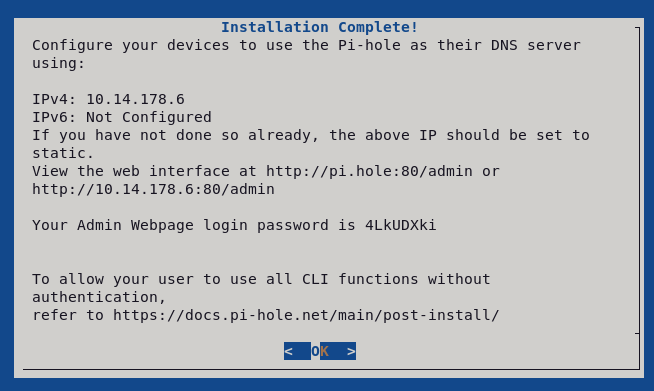
You'll probably want to change the web interface password to something more secure:
sudo pihole setpassword
Now that's all set up, you'll be able to access the Pi Hole web interface at serverip:80/admin
The last thing to do is to link wireguard to Pi Hole. To do this we're going to modify the config file /etc/pihole/pihole.toml:
Change:
interface = "eth0"
listeningMode = "LOCAL"
to:
interface = "wg0"
listeningMode = "SINGLE"
Changing these will will force it to only use the wireguard interface wg0.
Extra
If you're using your VPN in cases where you want to tunnel only specific port data to a specific client, you can add similar to the below to your /etc/wireguard/wg0.conf file:
PostUp = iptables -A FORWARD -i %i -p tcp --dport <PORT> -j ACCEPT; iptables -t nat -A PREROUTING -p tcp --dport <PORT> -j DNAT --to-destination <CLIENT>:<PORT>
PostDown = iptables -D FORWARD -i %i -p tcp --dport <PORT> -j ACCEPT; iptables -t nat -D PREROUTING -p tcp --dport <PORT> -j DNAT --to-destination <CLIENT>:<PORT>
Just change the <PORT> and <CLIENT> values to the port on on the client. This will send all data on that specific port to the VPN's IP to the specified client.
You should now have your own fully working private VPN with built in ad blocking.